Activating your Internet monitoring agent
Thank you kindly for your hardware agent order and your support of outagesio.com.
When your Internet monitoring agent arrives, it takes only moments to activate it.
1. Unbox your device and connect its LAN port to a free DHCP-enabled port on your router/modem. You may connect it to a switch if needed so long as devices connected to this switch can get an IP from your upstream DHCP service.
NOTE: If you have a sensor enabled agent, connect the sensor to the USB port before powering up. It should be auto detected and enabled in your dashboard. Give it a few minutes to start sending data. Be sure to place the sensor in a clean environment for longer life.
2. Power your agent up using a 1 amp minimum USB power source. Your agent should begin communicating with our network within a few minutes.
3. Next, if you have not already done so, create an account on app.outagesio.com and log into your control panel.
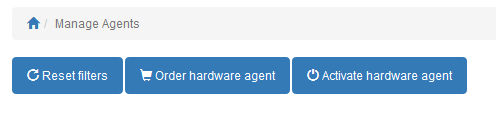
4. Click on the Agents menu item if you are not already on this page. Then click on the “Activate hardware agent” option.
5. Cut/Paste the credentials that were emailed to you in the correct sections.
MAC: XXXXXXXXXXXX
Activation code: xxxxxxx
Congratulations, your agent is now assigned to your account and will show up in your list of agents if you have more than one. Let your Internet monitoring agent run 24/7 so it can log problems with your Internet connection.
NOTICE: Our hardware devices are shipped using firmware that is purpose-built to act as a simple LAN-sided device behind a firewall. NEVER install agents directly to the Internet as these are not security-hardened devices. Activating your agent means that you understand this and take full responsibility.
If you need any help at all, please feel free to ask in our forums.